You can add your own custom forms to your site that will collect and store all of the information for you in one place on the site. This information is only accessible by those with access to the back end of the site, so no information is posted publicly.
Using a Gravity Form, you can create something simple as a contact form or something more elaborate such as a survey.
Creating a Gravity Form
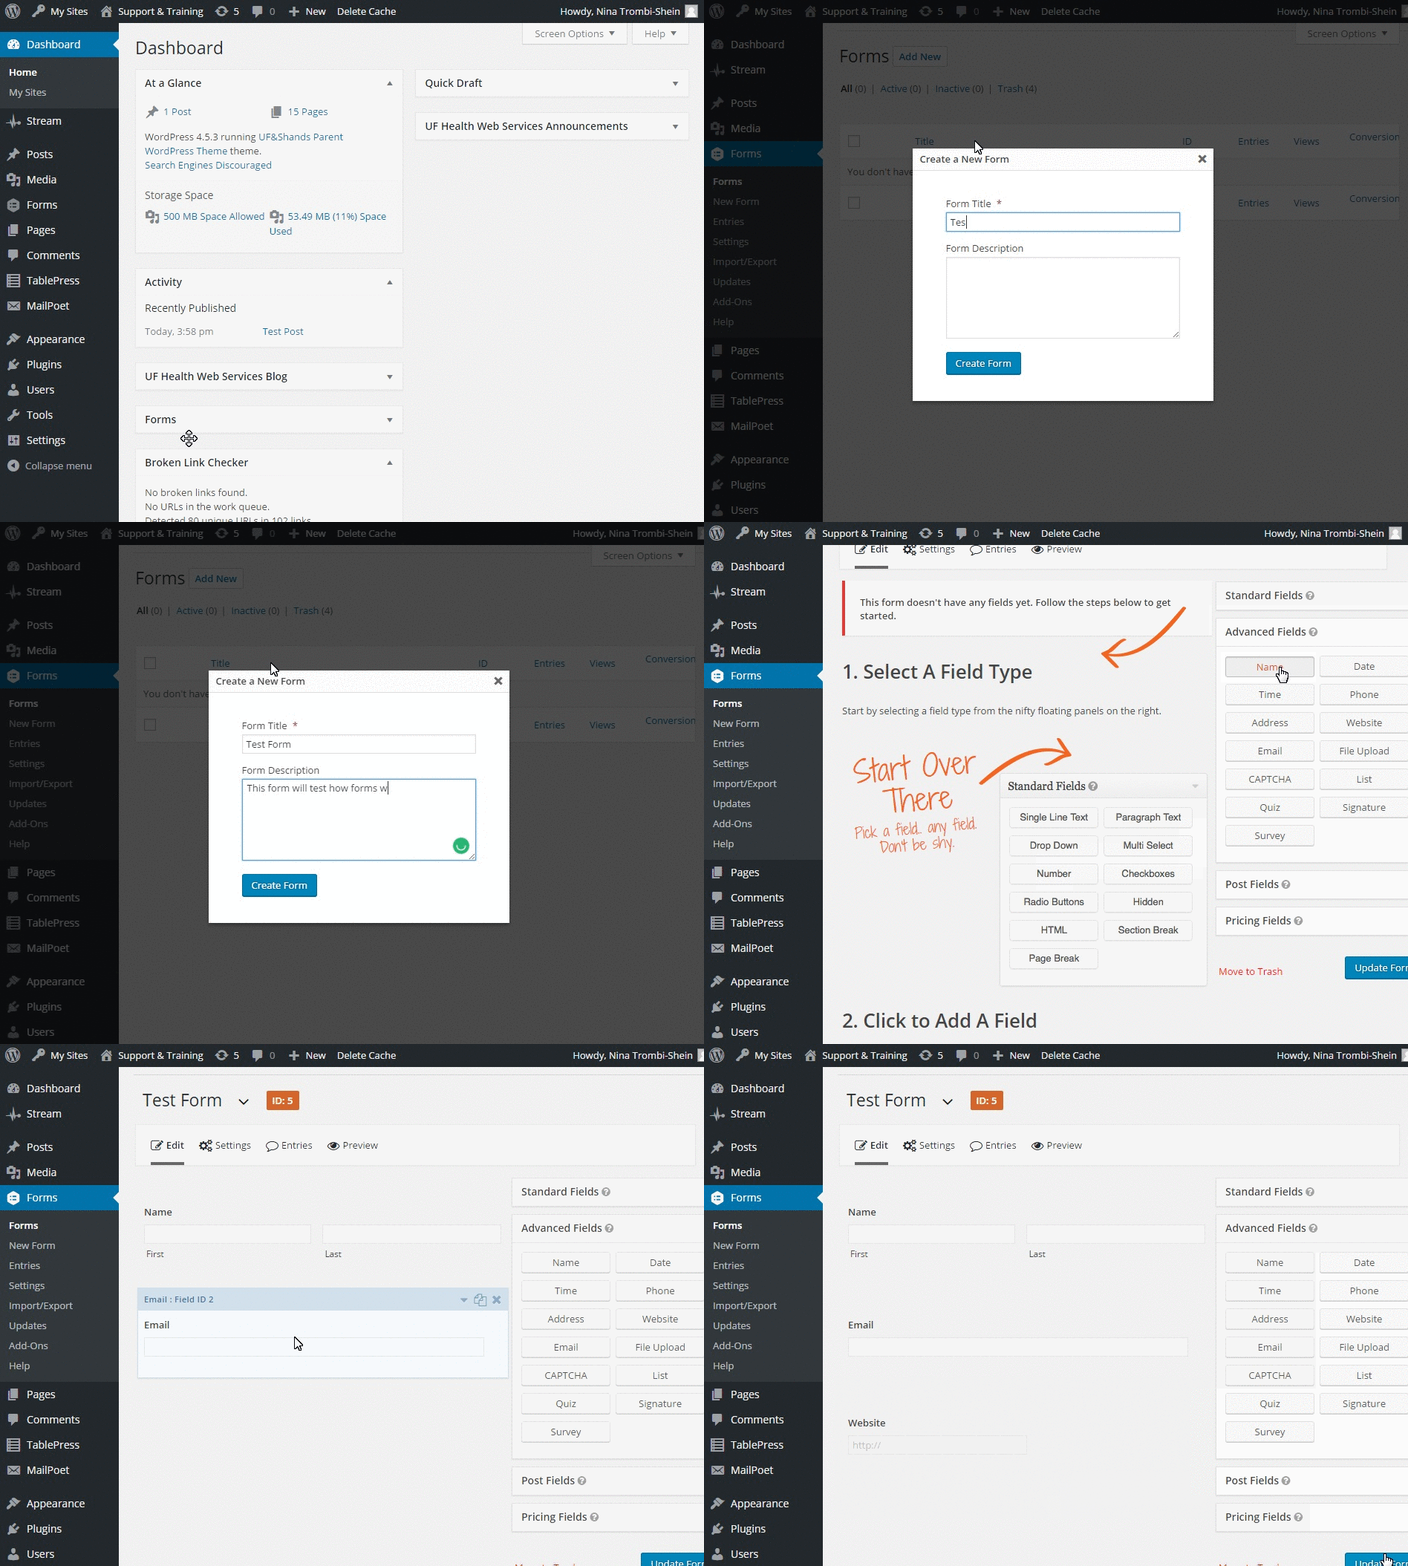
To create a form, click on Forms in the Dashboard Navigation Menu, the choose Forms. Select Add New at the top of the page, then a pop-up box will appear. Give your new form a Title and a short description, then click Create Form. You will be redirected to the Form Editor where you can begin building your form.
To build a form, first select a field type. The field type will expand to show you all of the options it contains. Click on the field type to place it in your form, then drag and drop it into place. If you want to rearrange the order in which your field types appear, you can drag and drop them to rearrange them.
Continue adding field types and then click on Update Form to save your progress.
Editing a Form
To edit a form, click on Forms in the Dashboard Navigation Menu, then select Forms. Click on the title of the form you would like to edit, and the form will open up in the Form Editor. Click Update Form to save your changes.
Form Settings
The Form Settings have three tabs. The first tab is Form Settings which are the general settings for the form such as the title and description, and a few options for restrictions and security. The second tab is for Confirmations.
Confirmations
A Confirmation is a message the site displays or sends to the visitor once they have completed the form. There is a default confirmation you can edit, or you can create a new one by click on Add New. When creating a confirmation, you have the choice of displaying just text on the screen in place of the form, redirecting the visitor to another page, or external URL. If choosing the text option, you may want to have the confirmation message display the visitor’s inputs on the page as well for them to view and save. You can do this by clicking on the small grey button to the right of the large text box and choosing the fields you want to appear from the drop down list. If you want all form data to appear without selecting every field, choose the top option, All Submitted Fields. This will create the code needed in the text box. Click Save Confirmation to save your progress.
Notifications
A Notification is a message sent from the site to the designated person or persons once a visitor has submitted the form. There is a default notification, but a new one can be created by clicking Add New.
To send a notification to someone via email, type in their email address in the Send to field and complete the fields below it to include your sender information (name and email), as well.
Similarly, to Confirmations, with a Notification message, you can include all the form data in the message by clicking on the small grey button to the right of the Message text field, and choose the All Submitted Fields option, which will create the code needed in the text box.
It is not appropriate to collect sensitive personal information or send notifications to unsecured email addresses outside of the University and UF Health enterprise systems.
Adding a Form to a Page or Post
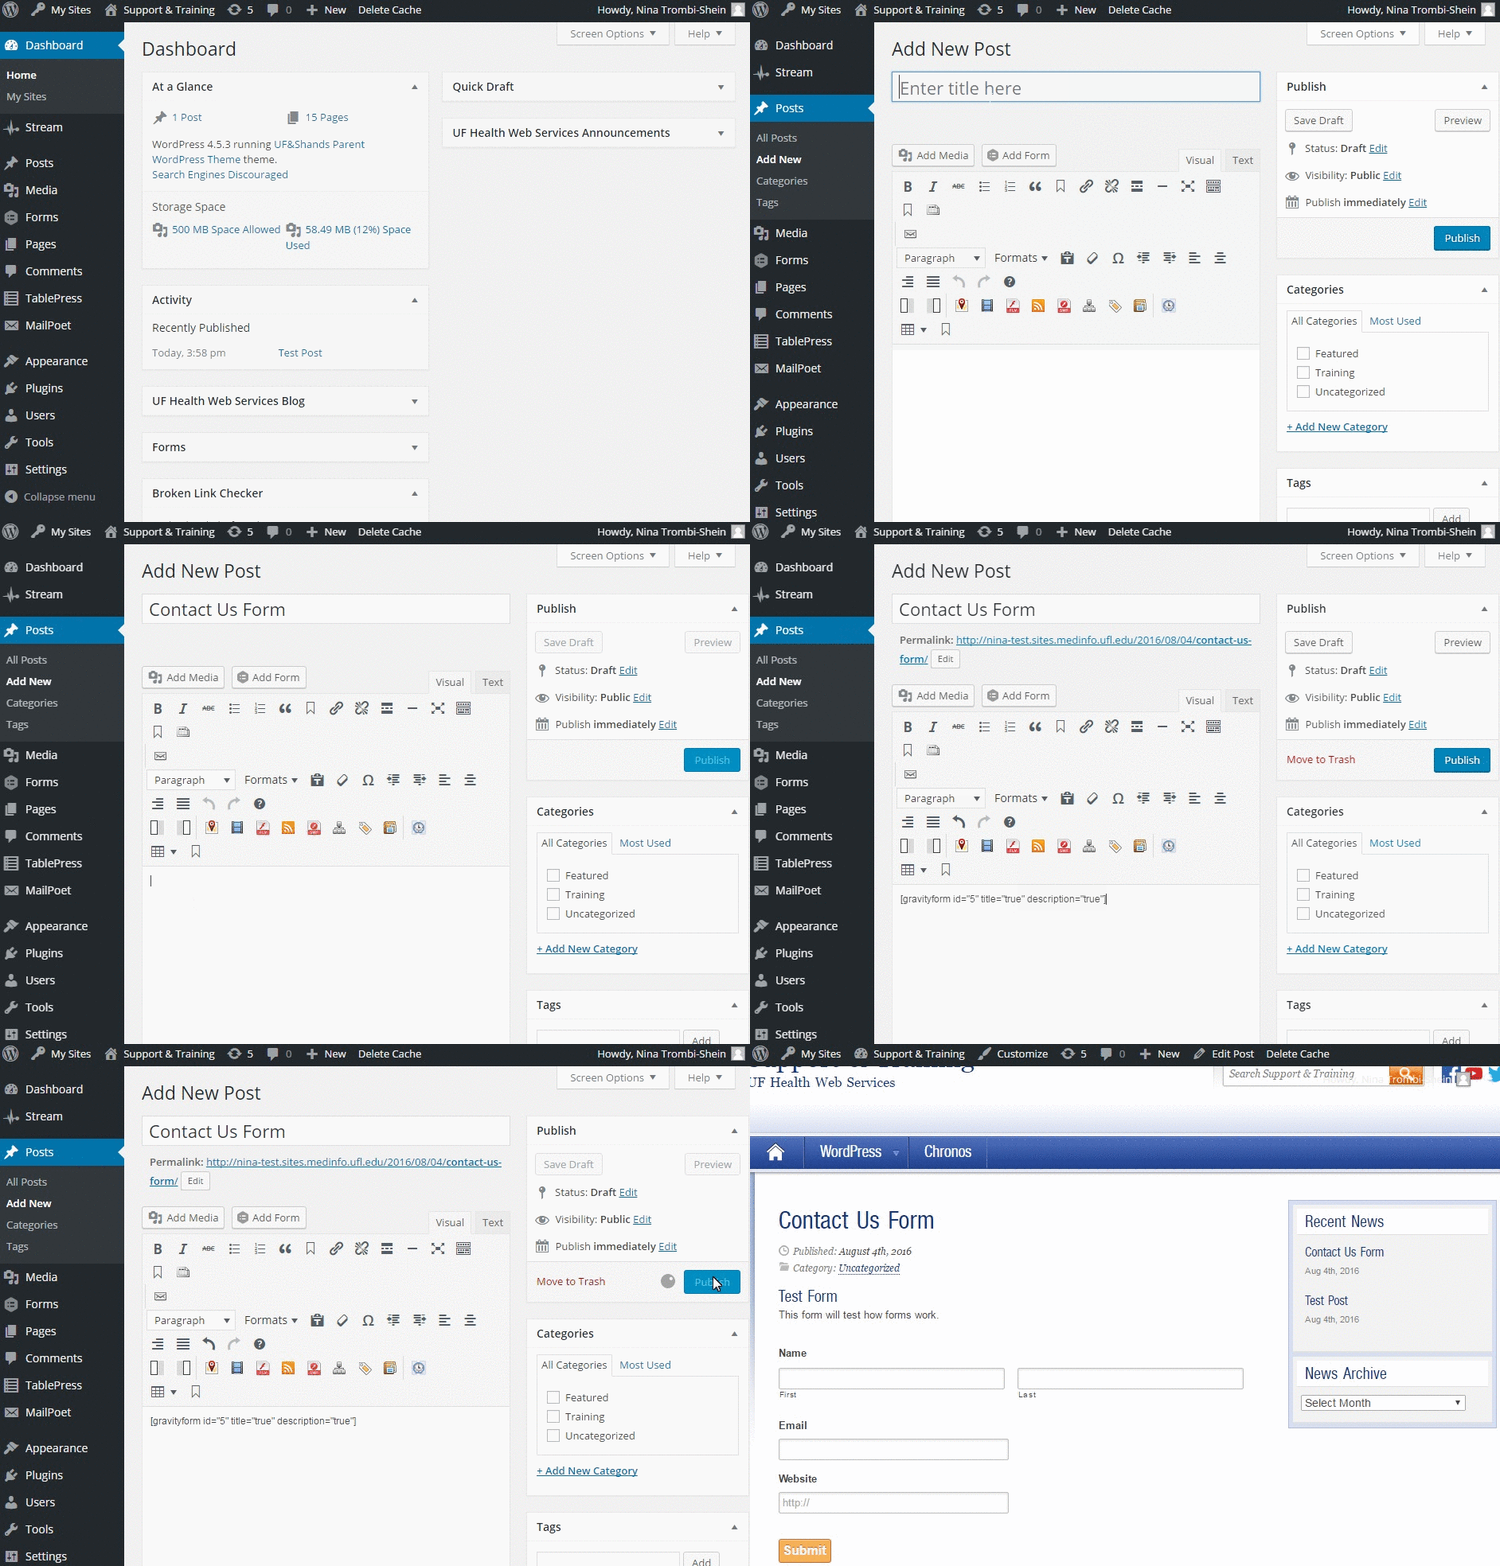
In the toolbar of the page or the post you want to insert the form in, click on Add Form. A pop-window will open, and you can then select the form you want to insert. Click on Insert Form, and the shortcode for the form will be automatically added to the page or post. Click on Update, and then view the page or post to see the form.
In Apollo 2, you would use the Gravity Forms block to add a form to a page.
Training for Gravity Forms is available by contacting us or through a short video available on the Training Videos web page.


