
Bridge allows you to upload files to your personal profile page or a group page. These files (depending on the level of access you set for the files) are then searchable and shareable on Bridge. Click here for more information on using Files in a collaborative group.
Note: protected health information (PHI) or sensitive student information is not permitted on Bridge.
Locating Your Personal Files

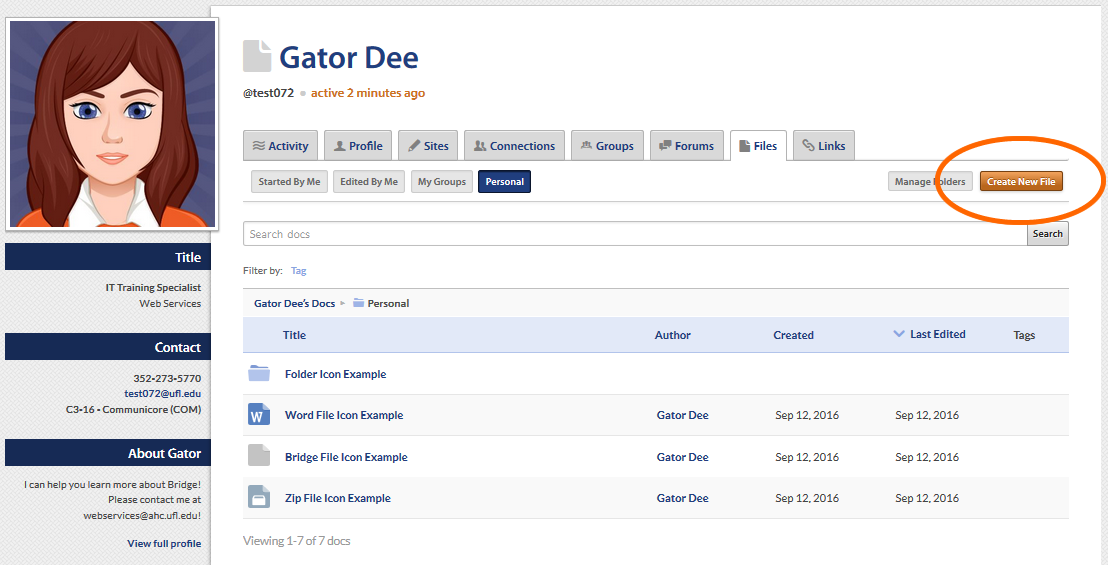
Your personal files can be located by clicking on the Files button just beneath your profile picture.
Create Files
Files can be created within Bridge or existing files can be uploaded for sharing or collaboration.
To create a file
- Click on the Files button just beneath your profile picture on the Bridge homepage. See above.
- Select the orange Create New File button in the upper-right corner of the page.
- Click on the large Add Files button and choose the file you wish to upload.
- Select the levels of access you want to assign to the new file, and choose a group from the drop-down menu under Associated Group if this file should be viewable by a group you are a member of. Select a folder and assign tags, if needed.
- Click on Save.
Set Access Rights
Documents can have different access rights depending on what you choose. For personal documents with no associated group, you have two options: Anyone at UF Health (meaning any Bridge user) or The file author only (just you). By default, file access is only granted to you.

Editing a File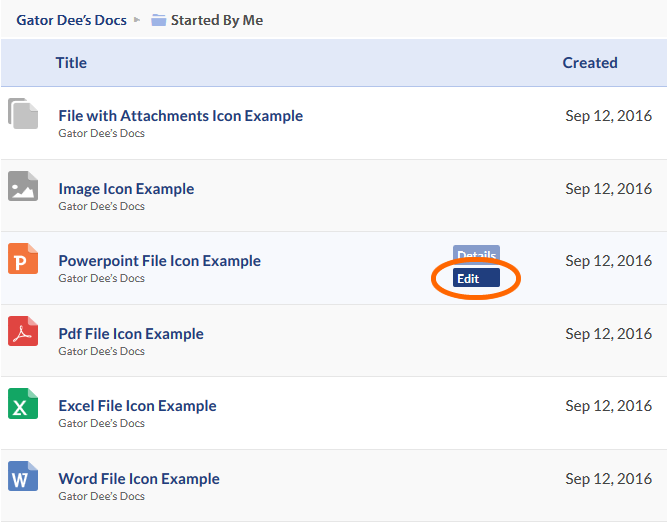
File editing in Bridge gives you a few options: Rename, Replace, or Delete. You can also adjust user access for the file, assign to a group or switch groups, and edit/add a file description.
To edit a file
- Click on the Files button just beneath your profile picture on the Bridge homepage. See above.
- Hover your mouse over the title of the file, and choose Edit.
- Rename: Hover your mouse just under the Add Files button, and select Rename. Type the new file name in the text field that appears.
- Replace: Hover your mouse just under the Add Files button, and select Replace. Locate the file on your computer and upload it to Bridge.
- Delete: Hover your mouse just under the Add Fire button, and select Delete.
- Readjust the levels of access for the file, and choose a group from the drop-down menu under Associated Group if this file should be viewable by a group you are a member of. Select a folder and assign tags, if needed.
- Click on Save.
Naming Files
When creating and naming files there are certain guidelines that will help keep your files in order and organized.
- Don’t use special characters such as ~ ! @ # $ % ^ & * ( ) ` ; < > ? , [ ] { } ‘ ” and |
- Best Practice is not to use spaces in file names. Instead use:
- Underscores, e.g. file_name.xxx
- Dashes, e.g. file-name.xxx
- No separation, e.g. filename.xxx
- Camel case, where the first letter of each section of text is capitalized, e.g. FileName.xxx
- Try to keep file names short
 Associate with a Group
If you associate the file with a group you add the option of making the file accessible to the group. The file can be read only by the group or it can be set to be edited by the group.
Managing Folders
When creating a file it can be placed in an existing folder or a new folder can be created for the file.
When creating a file or in the Edit mode you can place your file in an existing file by choosing that folder in the Folder drop-down or you can choose to create a new folder and give your new folder a name and choose a parent folder if desired.
File Type Icons
Note: A Bridge file is a simple text file created through Bridge rather than created in a stand-alone program and then uploaded to Bridge.
![]()